

How to customize the marauder helmet
A DIY guide by guest writer Mike
I wanted to turn a plain, dark helmet into a characterful piece for my fantasy LARP kit, using its original shape, rivets, ventilation holes and lower rim as part of the design. The finish grew around an olive-green helmet, a pale three-arrow emblem, a vivid eye motif, warm metallic-looking trim, small decorations and a sculpted horn.
This guide follows the creation of this custom helmet, inspired by decay and corrosion.
Materials & tools
- Helmet: I used the Marauder Helmet from Epic Armoury, but you can use any helmet you like
- Mountable Demon Horns: I used the Large size in Dark Bone color
- Paint: I used paint from Two Thin Coats for the eye and Army Painter Spray Primers for painting the base of the helmet
- Fine detail brushes: for painting the eye and adding outlines
- Bigger brush to paint the surface of the helmet, if you do not want to use spray paint
- Heavy paper or masking tape: for making a stencil, choose what works best for the surface and size of the emblem you choose
- Airbrush: if you do not want to use brushes for shading, airbrush is a faster option
- Protective finish for the paint: I used Satin Varnish by Army Painter, but you can also use a specialized sealant for metal
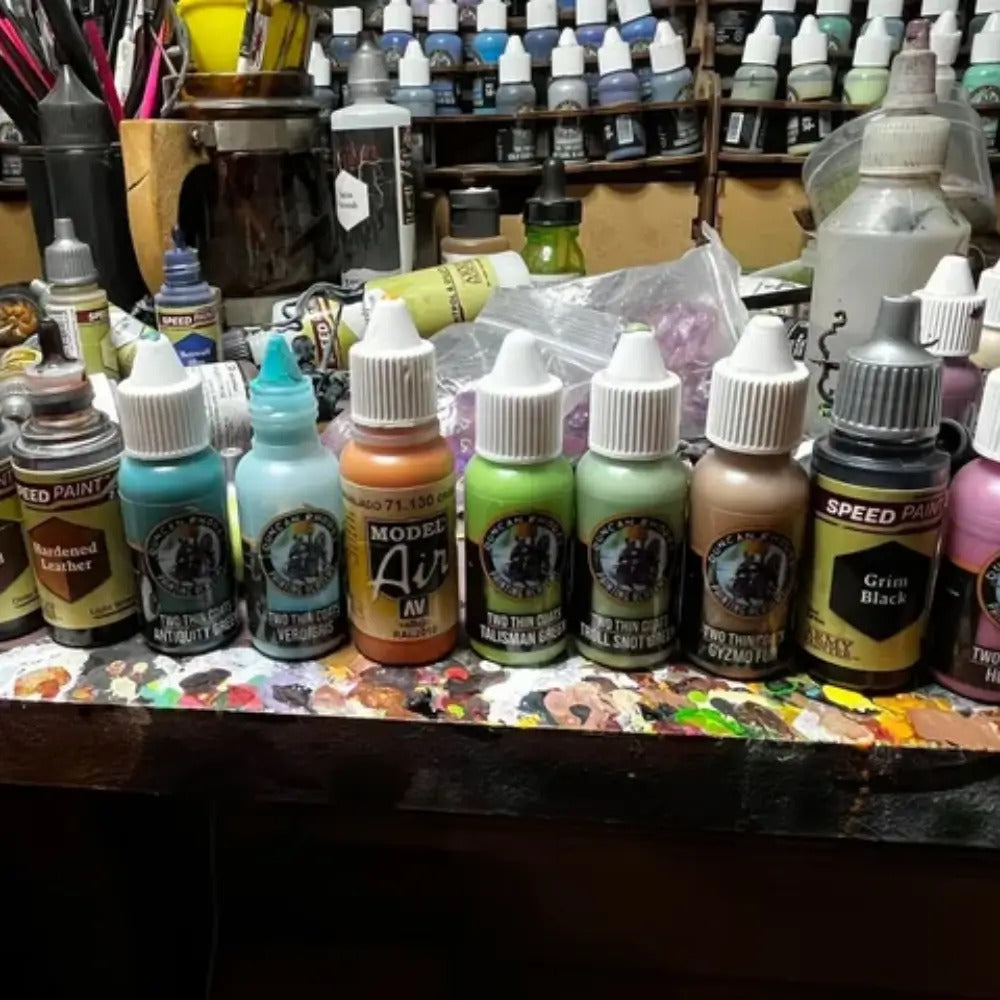
Colors used in the guide:
- Army Painter Colour Primers: Army Green, Skeleton Bone
- Army Painter Speed Paints: Absolution Green, Hardened Leather, Grim Black, Dark Wood
- Two Thin Coats: Iron Oxide, Verdigris, Antiquity Green, Talisman Green, Troll Snot Green, Gyzmo Fur, Hot Pink
Helmet used in this guide


Step 1
Apply the Base layer
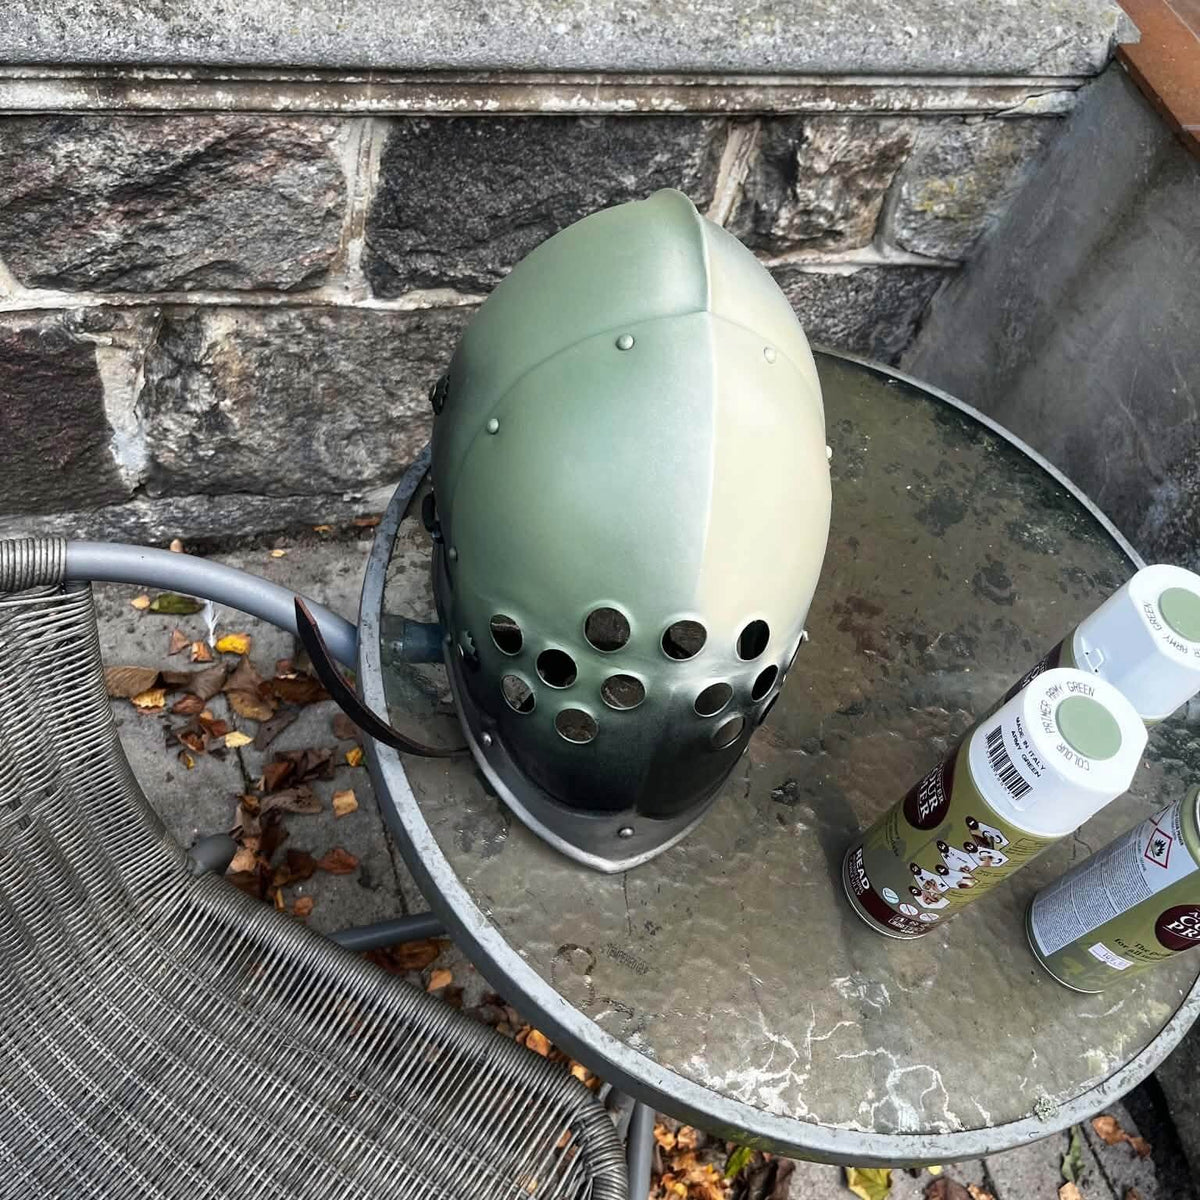
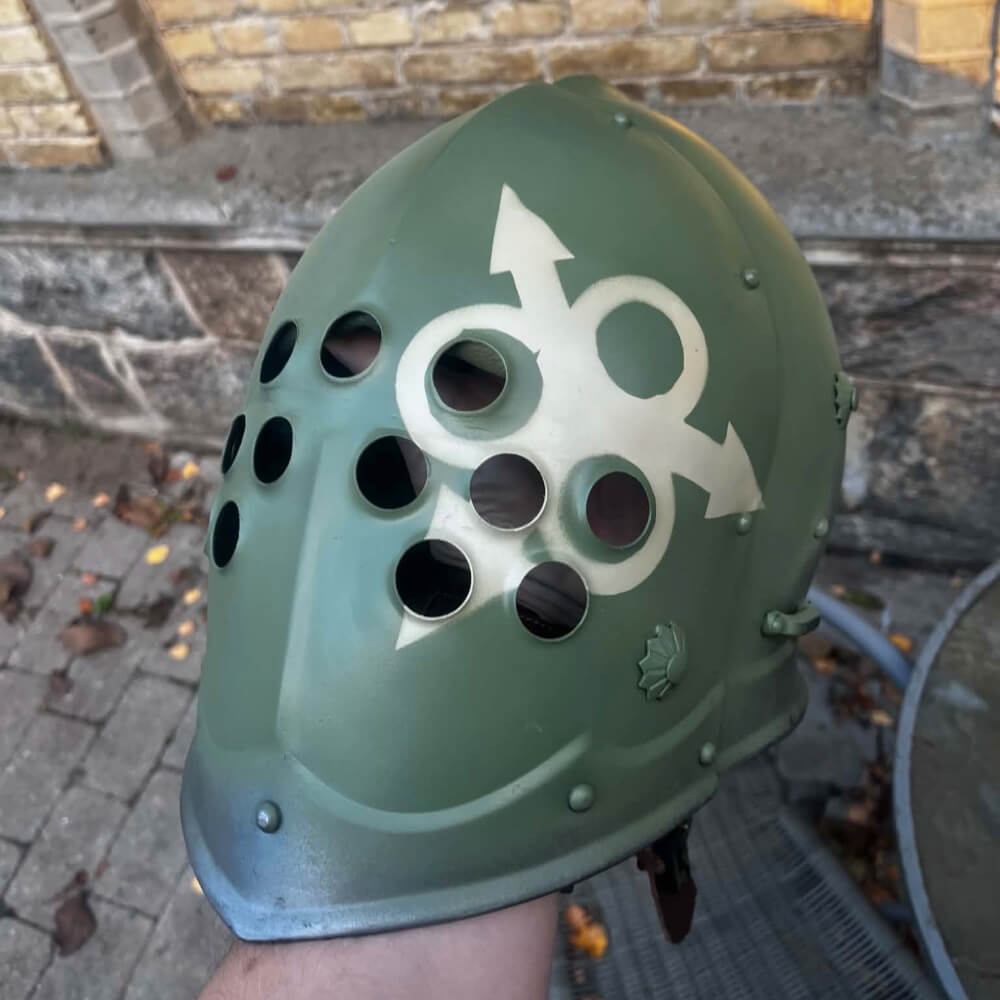
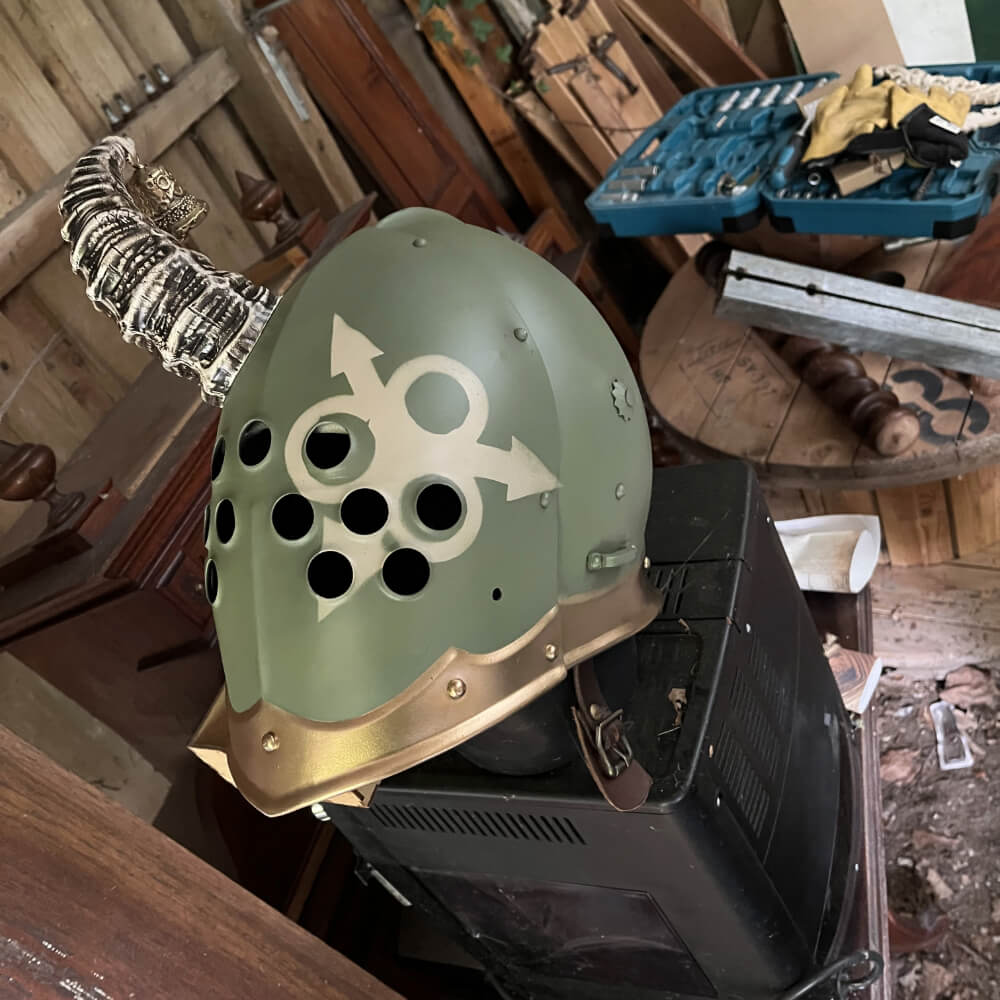
Using the Army Painter's Army Green, I applied the first layer of paint to the helmet. With the Skeleton Bone, I added a spray of paint to the side of the helmet where I planned to add the emblem later on. The rim of the helmet will be later painted with gold color, so there is no need to cover the whole helmet in green paint.
The base coat can set the look for the whole helmet: you can create a gradient with paints, going from lighter to darker, or only paint parts of the helmet, creating a unique look.
Step 2
Adding the stencil
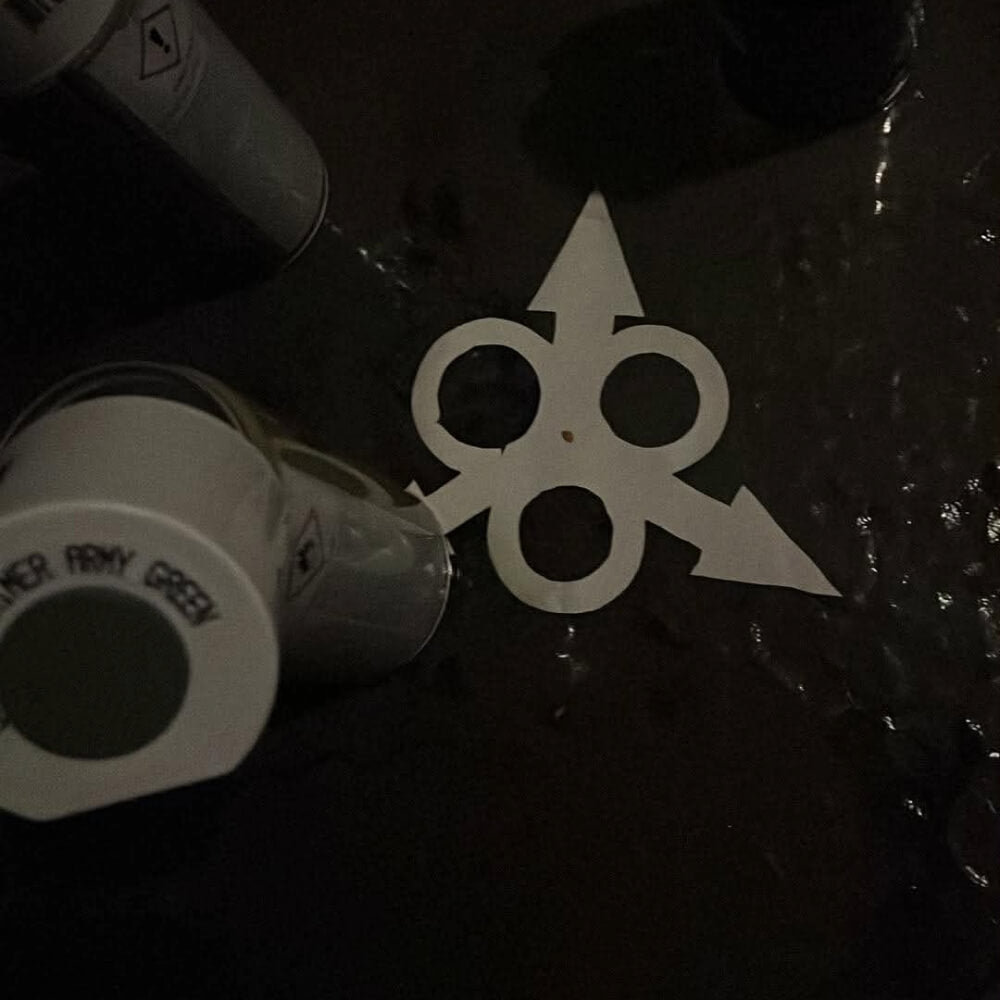
The three-arrow emblem was treated as a deliberate graphic feature on the front. I planned the shape separately, printed it out to size and cut it out as a stencil, then added it to the part of the helmet coated with Skeleton Bone and oversprayed with the Army Green shade, creating a distinct emblem with sharp edges.
Tip: Keeping the symbol light makes it readable from a distance and ties the future eye detail and ventilation holes into one strong front-facing design.
Step 3
Adding the horn
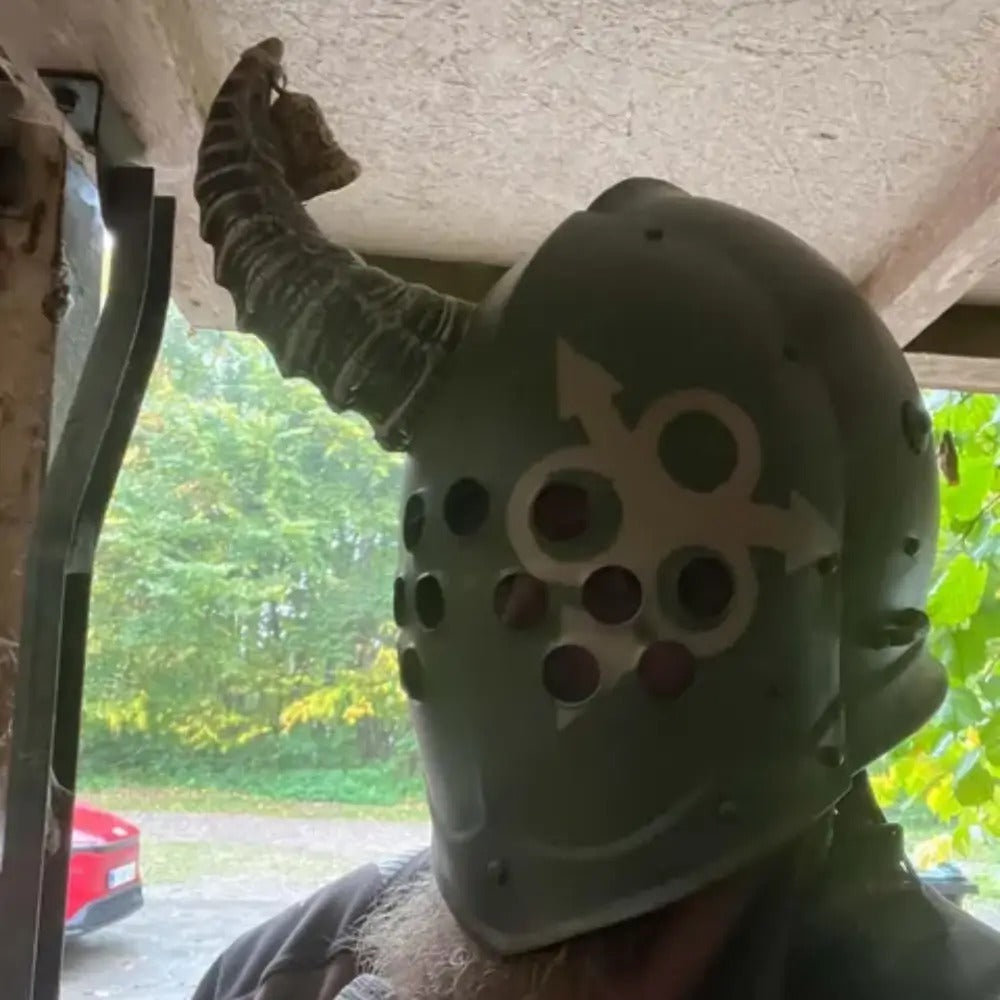
My plan was to attach one of the two Mountable Demon Horns I have purchased. The horn has a ridged texture, which I will later emphasize with some paint.
Before painting the helmet, I checked the horn's position and fitted it to the helmet. The Marauder Helmet has holes for mounting the horns, but I wanted it to be mounted in a different place, so I simply drilled a hole where it was needed.
After applying the base layers of paint and the emblem, I attached the horn. It comes with a bolt, but I added 2-component glue for a foolproof connection to the helmet.
Horns used in this guide


Step 4
Painting the eye and helmet rim
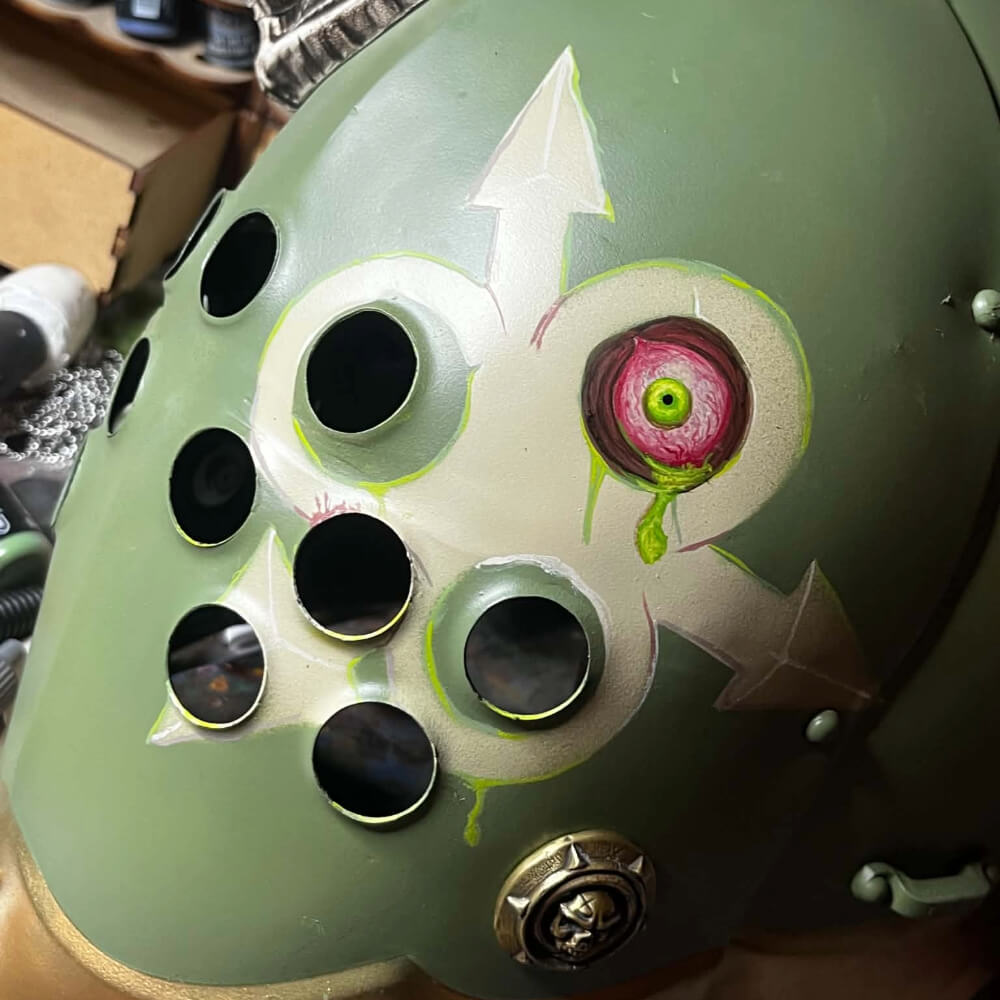
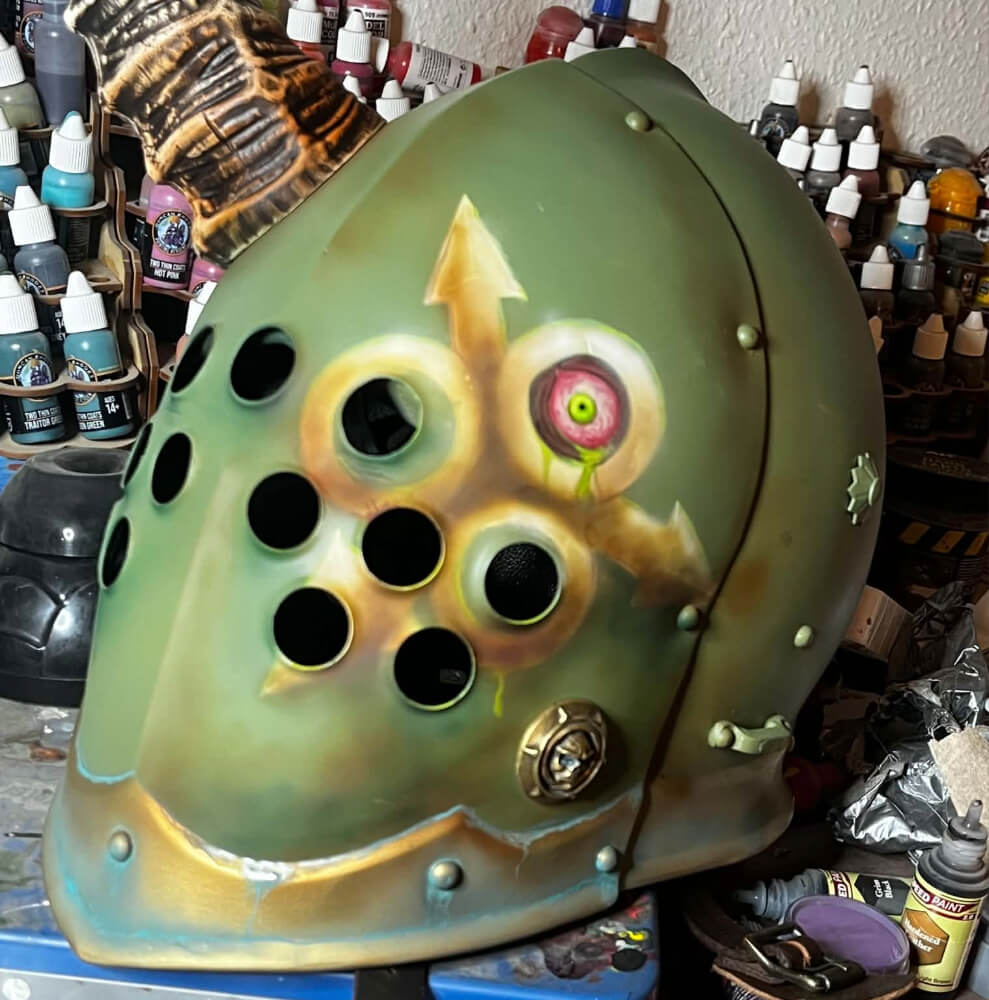
The eye is the most vivid detail on the helmet. Its pink-red outer area and bright green centre contrast with the quieter green and bronze palette. Warm ochre and brown tones around the emblem and ventilation holes soften the transition between the pale graphic and the helmet, creating a layered look. The dark ventilation openings remain unobstructed.
I decided to paint the helmet's rim in gold: it's a small detail, but it accentuates the rounded off shape of the helmet. To paint the rim, I covered the helmet in painter's tape, leaving only the areas that I wanted to be gold. The paint used for this step is a gold gloss paint that I have found in a local supply store.
Airbrush vs. brushes
I prefer to use airbrush for blending colors and creating a smooth gradient, since it's much quicker. If you do not own an airbrush, a sponge or a brush can be used, though it might require you to try out a few different techniques to find what works best for you.
Techniques to consider when blending paint with brushes:
- Stippling: remove most of the paint from your sponge or brush, then gently dab it on the surface to build up color. Tip: start with dabbing one spot and slowly going outwards to create a smooth gradient.
- Transition color: Instead of blending a dark color into a light one, mix an in-between shade that would create a smooth transition between the colors.
- Glazing: Apply thin layers of paint and let each dry completely before adding a new one to slowly build up a smooth gradient.
Step 5
Weathering and sealing the helmet
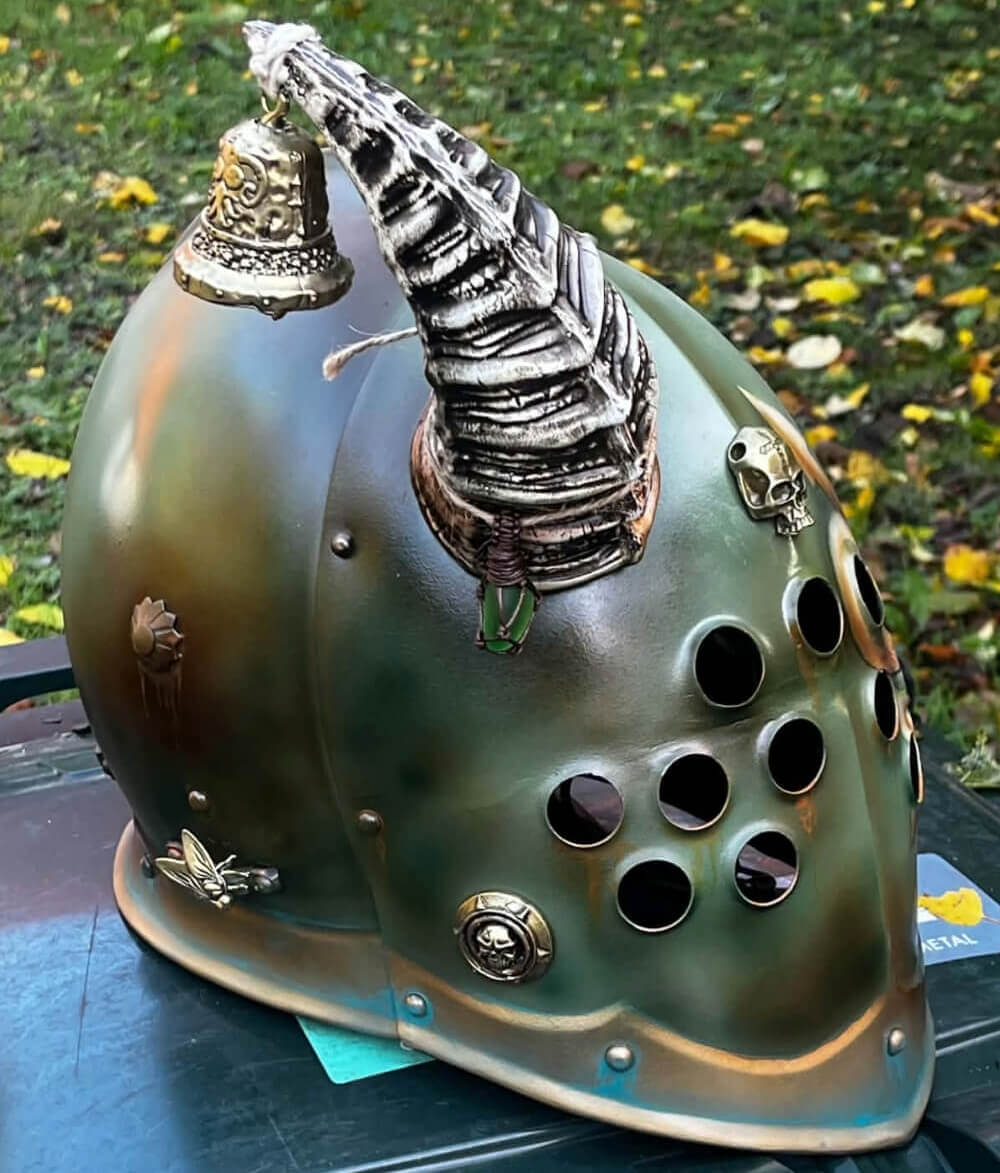
After the eye is done, it is time to add rust and wear to the helmet. Using airbrush, I muted down the green with Speed Paints from Army Painter, in particular, Absolution Green and Hardened Leather.
After that, I took out my rust effect paint (Iron Oxide from Two Thin Coats) and Verdigris from the same brand for the gold trim, going around every part of the helmet where I knew rust would happen naturally: in ridges and seams, also on all of the rivets.
A final step of painting the helmet was sealing the paint, which I did using a Satin Varnish from Army Painter.
Step 6
Adding decorations
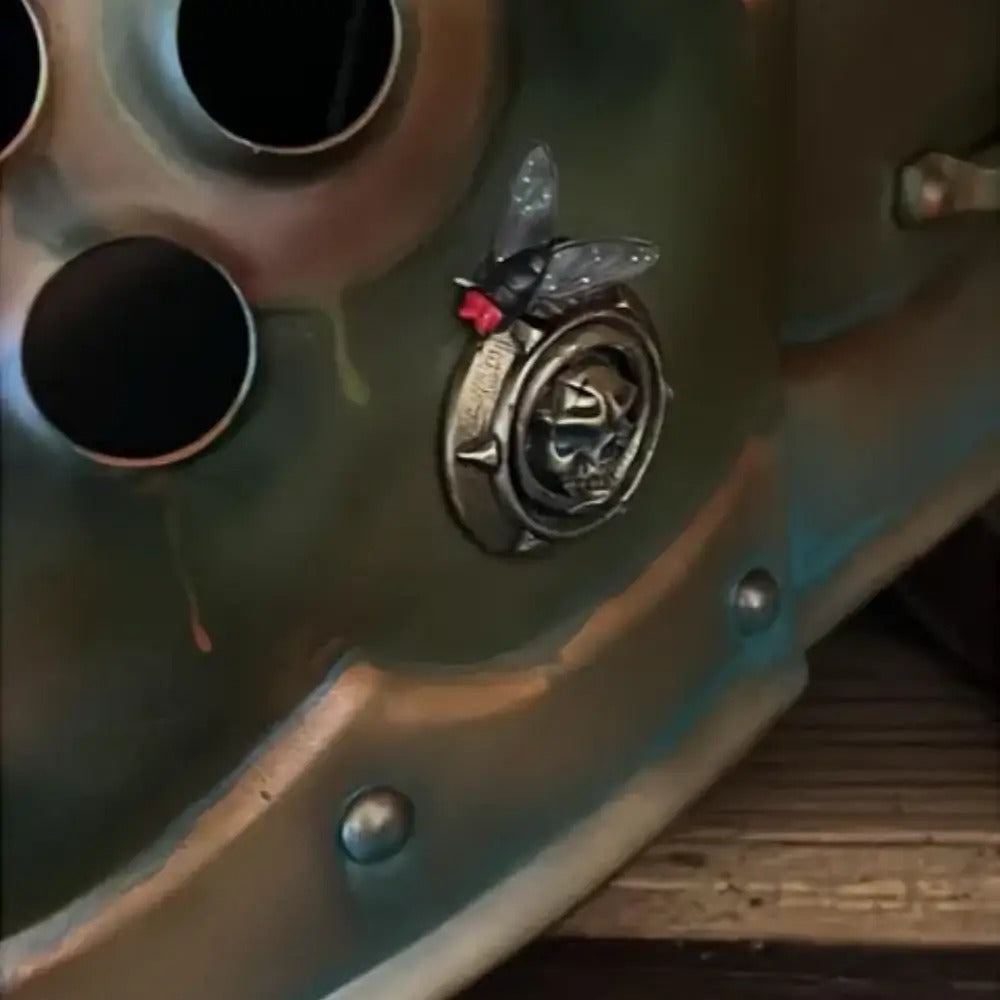
Small metal decorations, including the bell and skull details, give the helmet a handmade, character-specific finish. They break up the large green areas without overshadowing the emblem. The fittings remain visually distinct from the painted helmet, reading as separate objects attached to the helmet.
Final result
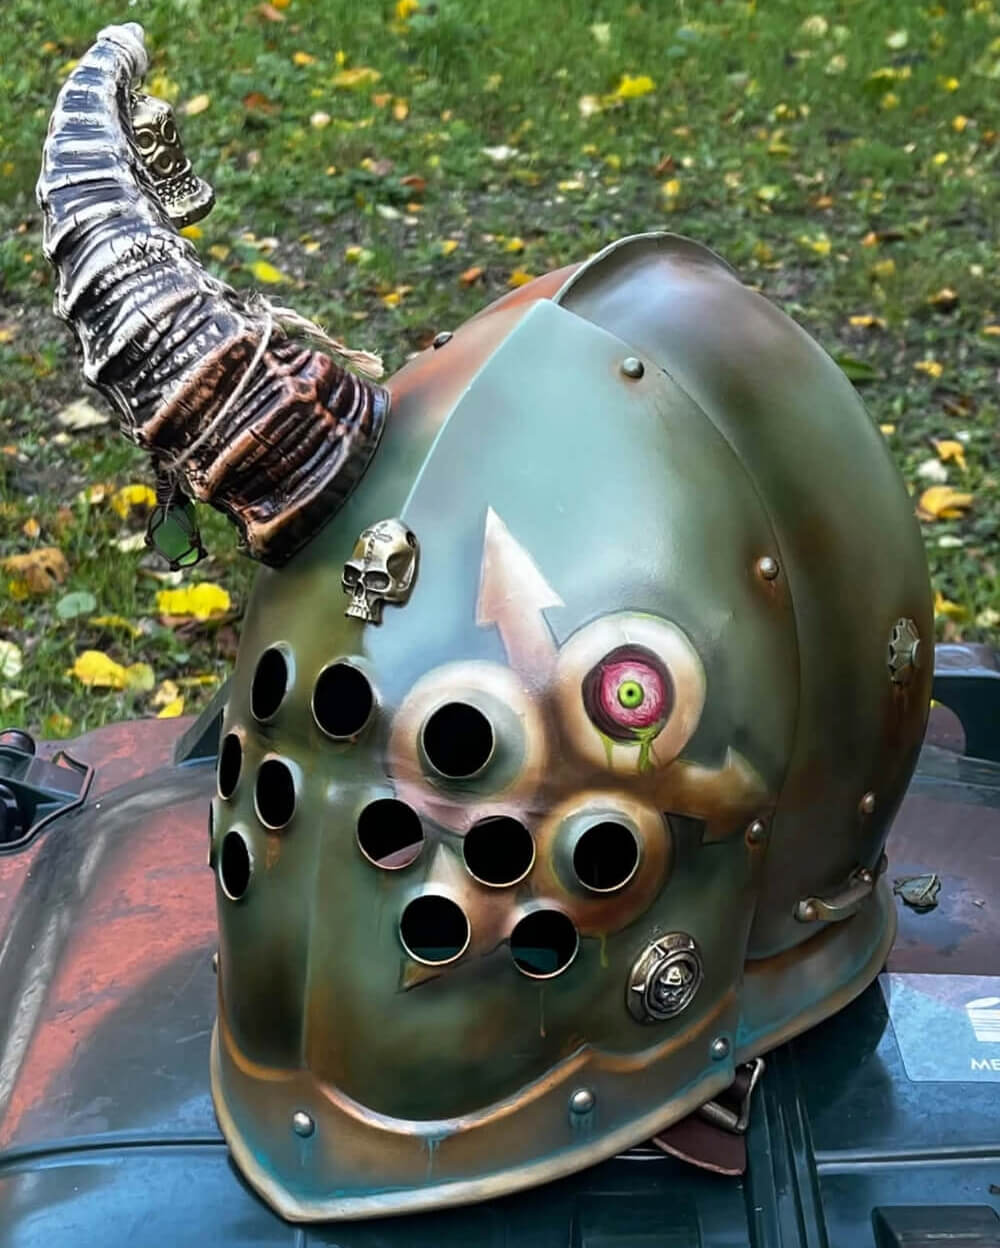
The helmet is done and ready to be worn at my next LARP event! My helmet is made for a dark, monstorous knight, but you can use this guide to customize your helmet and armor for any type of character.
I hope you find this guide useful and create your very own custom helmet!
P.S. from Epic Armoury: Feel free to post your customizations and tag us on Instagram so we can see it!
Read more
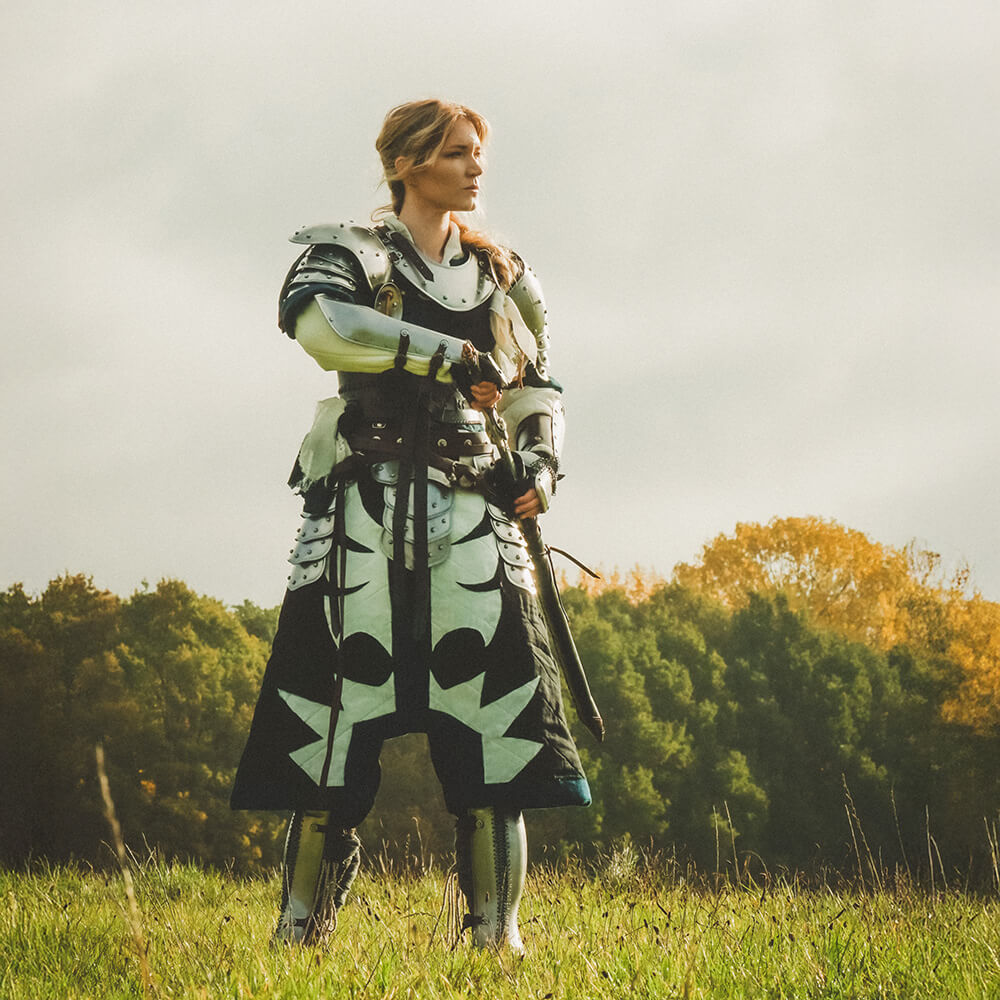
How to Paint Heraldry on a Gambeson, Banner or Tabard
Give your LARP gambeson, banner or tabard a coat of arms. A step-by-step guide to painting heraldry on fabric with simple tools and paint you may already own.
Read more